Clever and Useful DIY Projects You can Try for Your Home

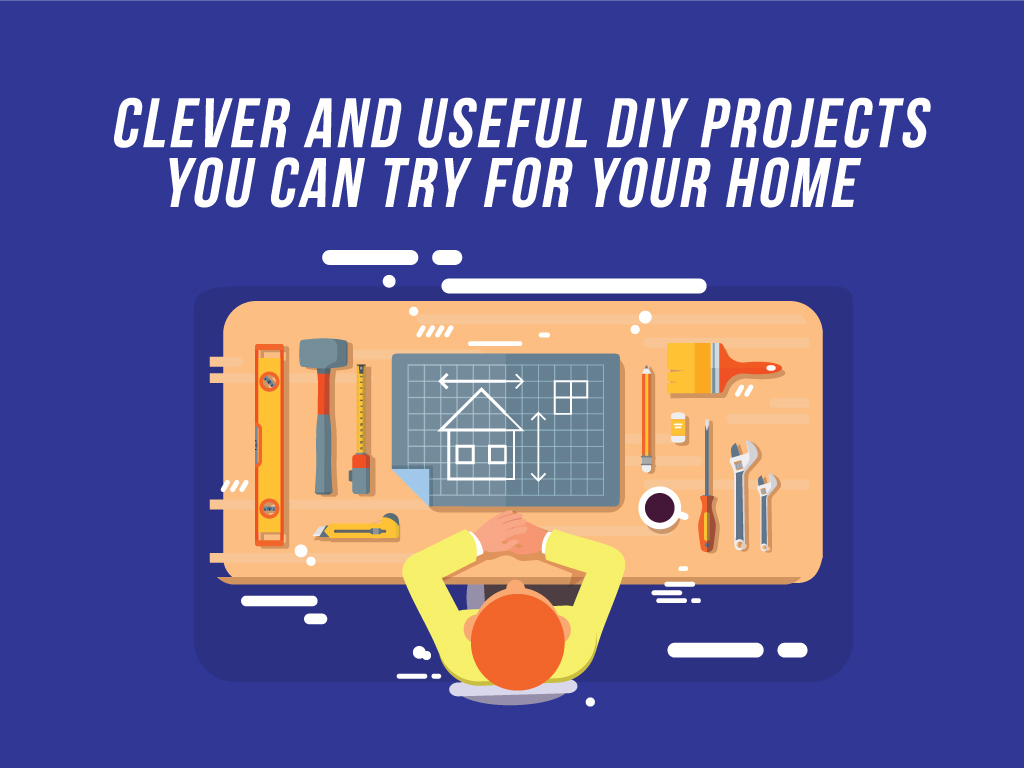
Admit it: every time you survey your home, exploring every nook and cranny, a part of you yearns desperately to improve it. Perhaps to purchase that missing appliance or furniture,  or to add more decorations. More often not, however, you don’t have the luxury to buy everything your heart fancies.

But you’ve found a solution. You take out your hand tools, dabbling with DIY projects you can do at home. You sift through tons of websites, only to be disappointed—you don’t want something that merely has aesthetic properties.

If that’s you, then you’re in the right place. Here are some projects that aren’t just pleasing to the eye, but also clever and useful.

Recycling Old Objects

Do you have piles of unused materials (such as wood or doors) gaining dust in your storeroom? Then it’s high time to take them out! In just a few tweaks, you can make them functional again.

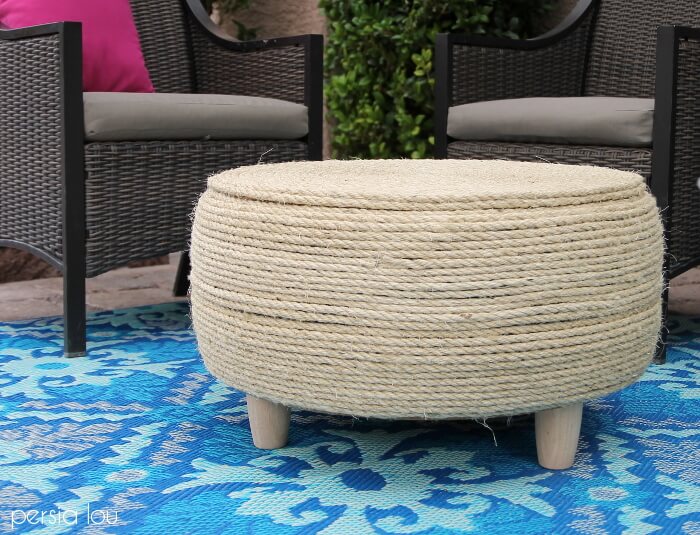
    • For car wheels, you can refurbish them into ottomans. Place some wooden panels on top, to cover the hole. Adorn them with ropes, or any other material that you prefer.

    • If you have kids and a massive tree in your garden, then you can transform these wheels into swings.

    • Have your children grown up so quickly, leaving their cribs abandoned and rendered useless? Don’t worry, they can still be used—but this time, as their mini tables. Remove one of the crib’s wider sides. Remove the mattress, so it can be used as a flat surface. Find small chairs, and voila!—they’re now good to go.
    • Old doors? No problem! They can be used as coffee tables in your living room. Jazz them up with some paint, and they’ll look as though you pulled them out of a store.

For the Bathroom

Do you often find yourself fumbling in the bathroom, especially with how cramped it can be? Don’t fret, there are actually ways for you to salvage some space.

    • Do you have an old ladder? Repaint it! Place it in a corner and use it to hang things, like towels, or storage baskets with hooks.

  • If you don’t have a ladder, then you can use towel racks.

For the Kitchen

Aside from the bathroom, you can also have more room in your kitchen.

    • Grab your towel racks—yes, they also have their purpose in this part of the house! Install the racks inside a cabinet and use them to store pan lids.

  • If your closets are also becoming stuffed, then you can hang your pots and pans on a rack suspended from the ceiling by using shower curtain hooks.

Key Takeaway

All of us, needless to say, want to spruce up our homes. But home improvement doesn’t have to be expensive! With some existing materials, with your hand tools, and with a dose of resourcefulness, you can revamp your personal space. Home DIY projects shouldn’t just be visually pleasing—they should also be extremely functional.

Creative DIY Christmas Home Decorations

As the most-awaited season nears, looking for easy DIY Christmas home decorations for your townhouse in San Juan or anywhere in the Metro can be thrilling. Either you design it according to the traditional Christmas decors, or inspire yourself from your favorite Netflix series – the choice is yours! Here’s a few Christmas decor inspirations you can freely try on your unit:

CHRISTMAS DIY GIFT BOW WREATH

Finally, the time has arrived! If you loved keeping gift bows from every gift you get, that one made out of plastic ribbons, here’s your chance to design them into a Christmas DIY gift bow wreath.

What you’ll need:

  • Gift bows
  • Flora craft styrofoam wreath
  • A Glue gun and a glue stick
  • Wire

What you’ll do:

  • First, gather your gift bows in place and shape them into a wreath. Look out for patterns and colors that will help make it appear congruent to each other despite the differences.
  • Second, attach a wire onto the flora craft styrofoam for hanging purposes.
  • Third, hot glue the gift bows around the wreath styrofoam and remember not to leave a space when possible. Keep it as rich as possible for a more pleasant look.
  • Fourth, hang it on your front door! You’ll never look at a Christmas wreath the same way again.

PAPER CHRISTMAS LIGHTS GARLAND

Looking for a way to up your Christmas decor gaming? Try this DIY paper Christmas lights garland that will definitely remind you of Joyce Byer’s Christmas lights during her search for her son, Will, on the original Netflix series Stranger Things!

What you’ll need:

  • Gray-colored cardstock
  • Your choice of colored cardstocks
  • A glue gun and a glue stick
  • Hole puncher
  • Scoring tool
  • Ribbon, twine or yarn

What you’ll do:

  • First, cut your gray-colored cardstock into 1 ¼” by 4” strips, and your chosen colored cardstocks in 1” by 8.5” strips.
  • Second, score your gray-colored cardstock every ½” and create two marks half an inch down at 1 ¼” and 2 ¾”. Then, fold your paper on the scored lines and use a paper puncher to create two holes on both the marked spots. Lastly, fold the two ends and overlap ½” onto the other end and hot glue the cardstock.
  • Third, shape bulbs. To shape these, you’ll have to fold the colored cardstock strips while lightly pressing at the crease. Then, pinch both ends together and push the strip against your palm. This will automatically form a light bulb when let go. However, if it doesn’t, try repeating the steps to achieve the shape of a Christmas light bulb.
  • Fourth, string the bulb with the twine. With the strip on your hand, punch a hole at the center of the strip, and make sure it passes through both the ends’ layers. Once done with all the strips, string it together with the gray light top using the twine. Make sure to keep the bulbs at the center, surrounded by the gray light top, and a bit higher to make it easier to put them altogether. You also have the choice to put in as many bulbs as you like for your garland.
  • Fifth, hang it atop your windows and enjoy the view!

Key Takeaway

Have you already tried doing them? Ring us up on the comments below and we’ll gladly lend you our ears about your DIY Christmas decoration experience! Surely, your townhouse in San Juan or wherever you are, looked extremely awesome with these fabulous decors.

Awesome 5 Minute DIY Projects

Have you ever thought what would be the best way to spend 5 minutes of your time? If you haven’t, then a great way to spend those minutes is by making some useful DIY arts and crafts! If you have some spare materials lying around, you can create some nifty and useful things in just a short amount of time. These things would be nice additions to your desk, office, or even at school. Here are some awesome DIY projects that you can do within 5 minutes.

1. Button Thumbtacks

DIY Button thumbstack

Tired of your old plain thumbtacks? Add some color to it by putting some buttons! To do this, simply get some thumbtacks, glue, and some colorful buttons. Glue the buttons onto the thumbtacks, and you now have a nice set of button thumbtacks to attach to your corkboard.

2. DIY Whiteboard

DIY Whiteboard

A nice and nifty way to save some paper is to make your own whiteboard using some stuff lying around at home. All you need is an empty picture frame (with glass) and some colored or patterned paper (you’ll only need one sheet) to make it look nice. Simply cut the paper to the size of the frame and slide it in, and you now have your own portable whiteboard where you can write some of your important reminders, or even some nice motivational quotes.

3. Color-coding your keys

DIY color coding keys

Have you ever experienced having to fumble around with your keys because they look exactly the same? A simple solution would be color-coding your keys! All you need is to apply some nail polish or modeling paint over the keys. You no longer have to struggle to pick the right keys anymore!

4. Mini Jewelry Dish

DIY jewelry dish

Need somewhere to place your jewelry over your table, without them falling on the floor and getting lost? Then creating your own jewelry dishes is the best solution. Simply get some old box lids, and some enamel paint. All you have to do is paint your box lids with some bright and vibrant colors, and then you now have some nice decorative jewelry dishes.  It is best to place them on your side tables and desks, as they are the most common places where people remove their jewelry.

5. Temporary Tattoo Mugs

DIY temporary tattoo mug

Remember those temporary tattoos that you used to put on your skin when you were still a kid? Apparently, they’re still around, and they can give your plain coffee mug some color and style. All you need is a mug, some temporary tattoos, a brush, a decoupage, and a sponge. Simply place your tattoo on the mug and hold it in place with a wet sponge. After removing the film and the sponge, brush the tattoo with layers of decoupage, and you now have a nicely decorated mug.

Key Takeaway

While 5 minutes may not seem like a lot of time, finding ways to maximize those minutes will help you find something productive to do. With these simple 5 minute DIY projects, you are sure to create nifty items with some materials lying around.

Awesome DIY Science Projects Must-Try

One of the most memorable moments in a kid’s life in school is when they did their first science projects. For most kids, that was their first hands-on experience with various scientific materials. But the learning does not end inside a school, as you can create your own DIY project ideas from the comfort of your own home. To get you started, here are some awesome DIY science projects you should try. Before trying these, it is important to have adult supervision during these projects for safety purposes.

Indoor rain experiment

Photo Courtesy: icanteachmychild.com

Ever wondered how clouds produce rain? Then this simple experiment can help you figure it out. For this experiment, you’ll need some hot water (adult supervision is needed), ice cubes, a mason jar, and a plate. To begin, pour some hot water inside the mason jar, the next step is to put a plate over the jar and place the ice cubes. The warm heat from the jar would make the ice cubes melt and cause condensation, which simulates rain.

Giant Gummy Bear Experiment

Photo Courtesy: en.wikipedia.org/

Another quick and simple experiment you can do with your kids. This nice experiment about absorption just needs a pack of gummy bears, and a jar of water. Drop in the gummy bear into the jar, and wait for a few minutes. The gummy bear will absorb the water and expand accordingly.

Homemade Hovercraft

Photo Courtesy: restlessmindboosters.blogspot.com

Ever wondered how hovercrafts work? This experiment would show you how hovercrafts float over the surface using simple materials you can find at home. All you need is a balloon, a CD, a push-up bottle cap, and some superglue. Attach the bottle cap on the CD using superglue, and then put the inflated balloon on the bottle cap. Once the balloon is attached, place your hovercraft on a flat surface, and see the whole thing hovers due to the slowly escaping balloon air.

Tornado in a Jar

This nifty little experiment shows you how a tornado looks like, and how it works. All you need is a mason jar, some water, and dishwashing detergent. Fill the mason jar with water until its almost full, and add drops of dishwashing detergent. Shake the jar hard, and then place on the table. When done right, you would be able to see a funnel shaped vortex inside your jar.

Shoebox Plant Maze

Photo Courtesy: room3puketeschool.blogspot.com

This is a fun and fascinating experiment which shows how plants always seek out sunlight. All you need is a shoebox, a few pieces of cardboard, a pair of scissors, some adhesives, and a bean plant.

To begin, add the pieces of cardboard to create your maze, and then put a hole on one end. Place the bean plant at the end of the maze and close the shoebox. Wait for a few days, and then open the box. You’ll notice that the plant’s stem would stretch and grow to reach the other end of the shoebox to get sunlight.

Here are some simple and fascinating science projects you can do at home with simple household materials. Not only are these experiments you can do outside of the school, but also a fun experience with your friends and family.